Step by Step Instructions
Step 1
Please go to https://secure.csusb.edu/ to install the Global Protect VPN client.
The VPN software is necessary for your computer to connect to the campus network. This will allow you to access campus resources from outside of campus.
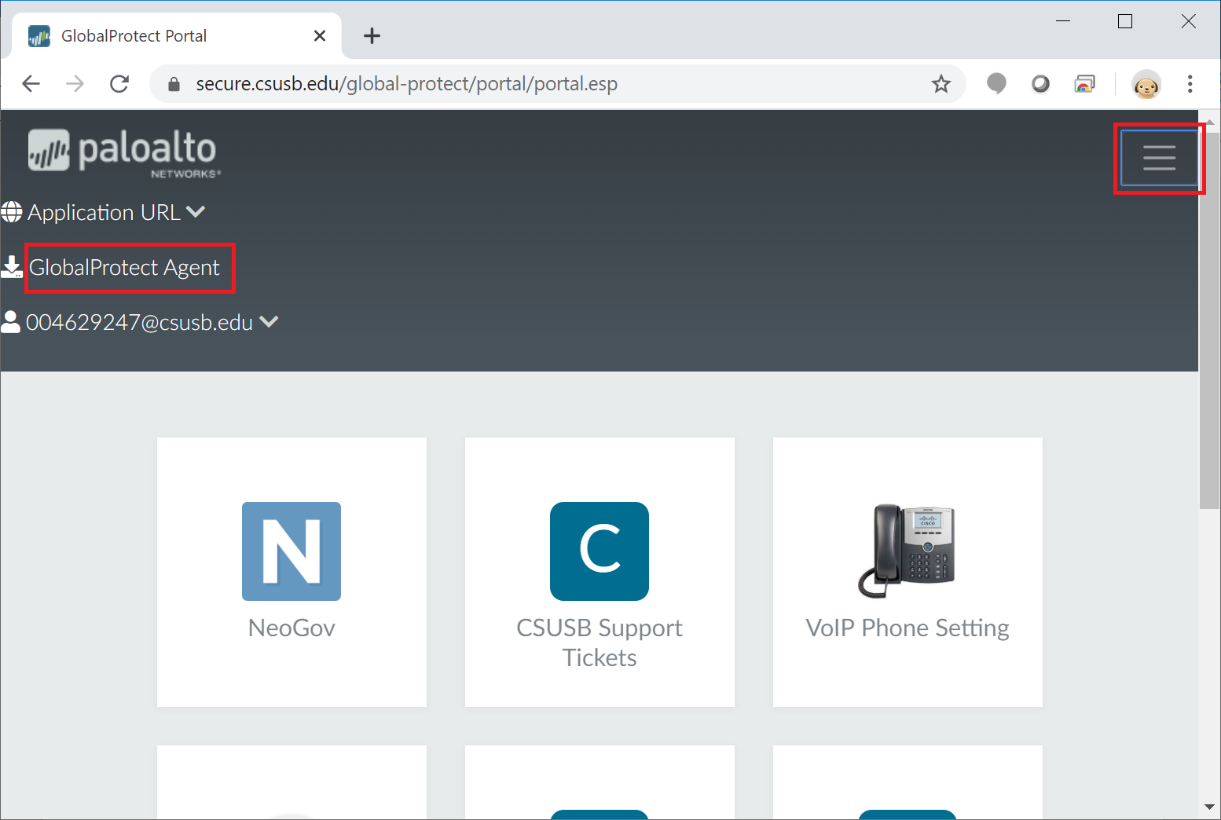
Click the menu button to expand the selection. Select GlobalProtect Agent from the dropdown menu.
Step 2
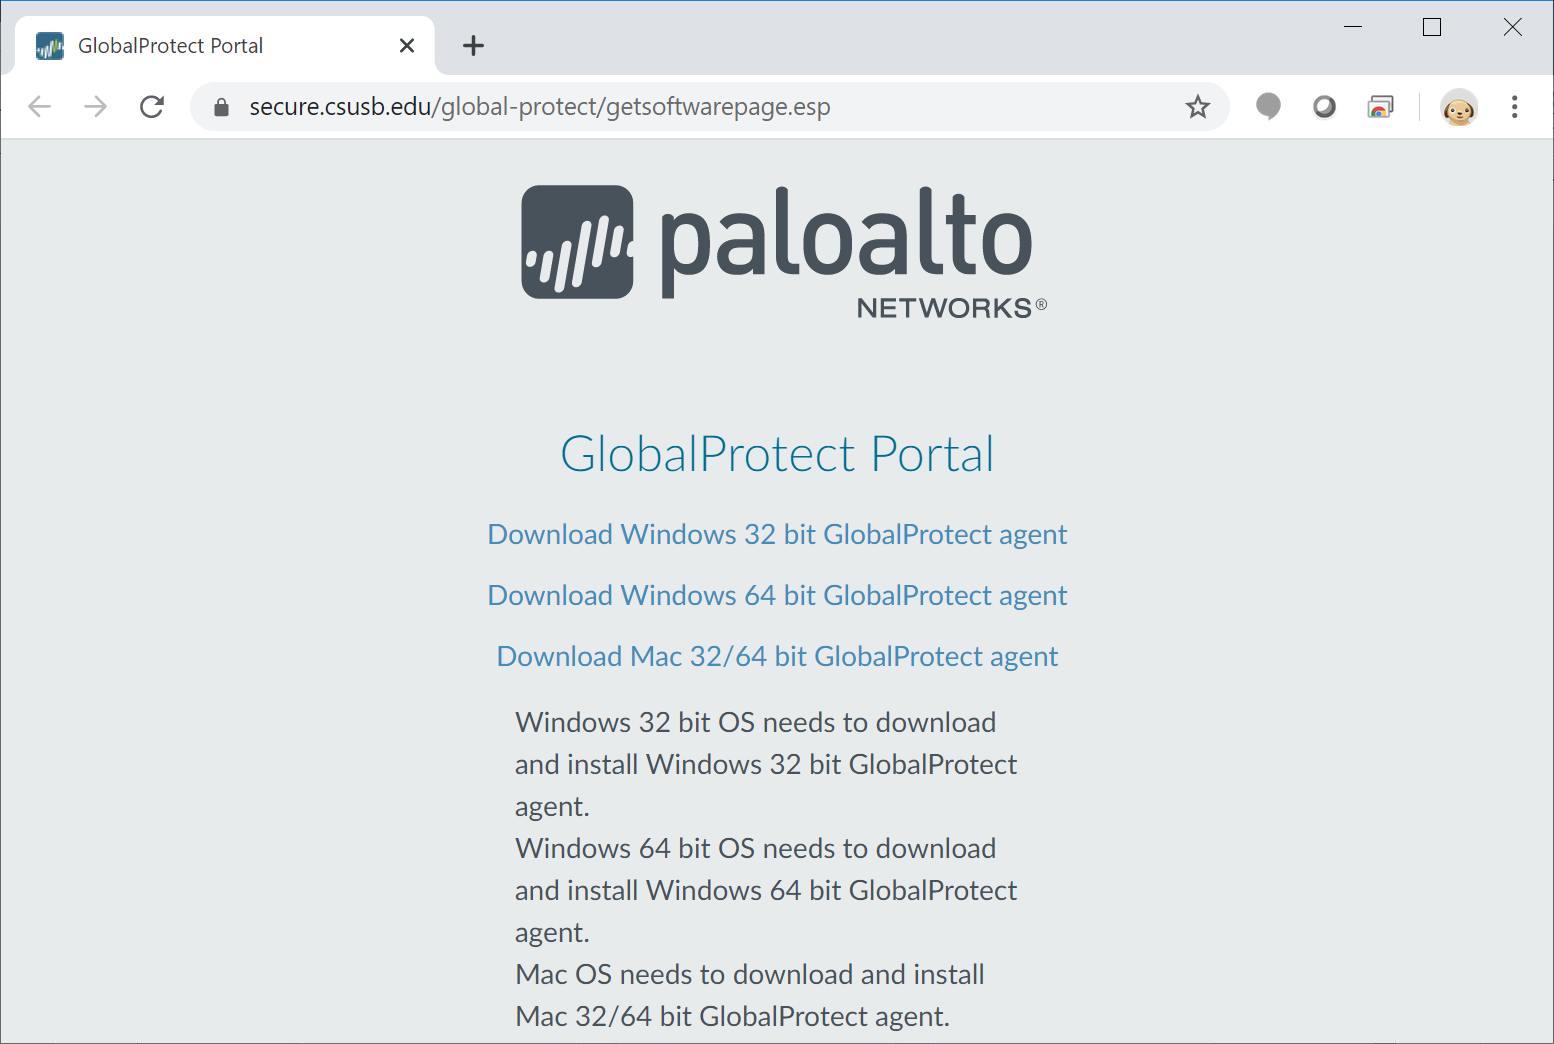
Download the client that corresponds to the version of Windows or MAC OS your personal computer is running.
Step 3
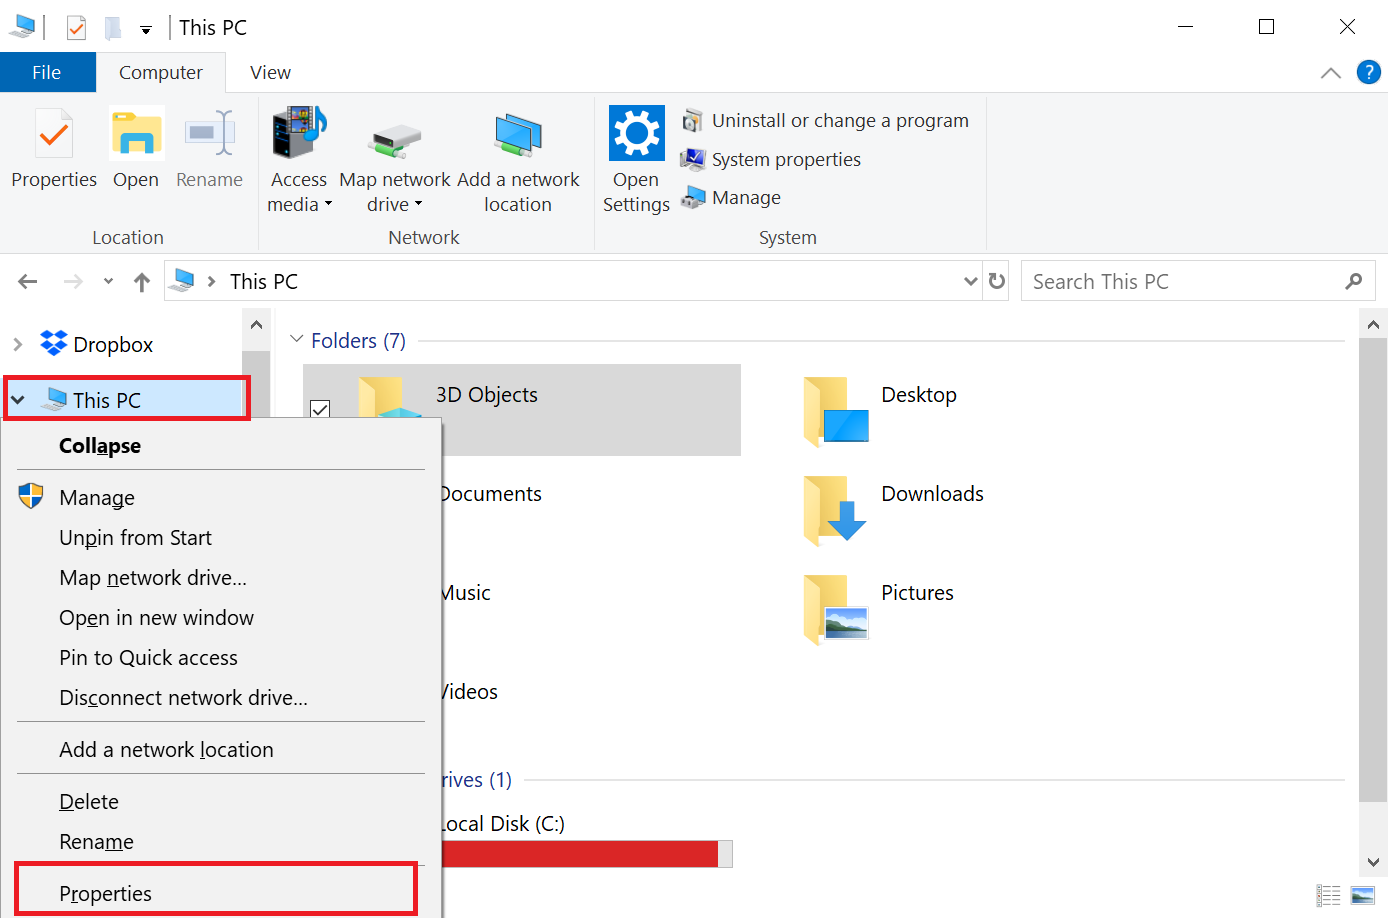
You can find out what version of Windows you are running by right-clicking on This PC in your Windows Explorer and then selecting Properties.
Step 4
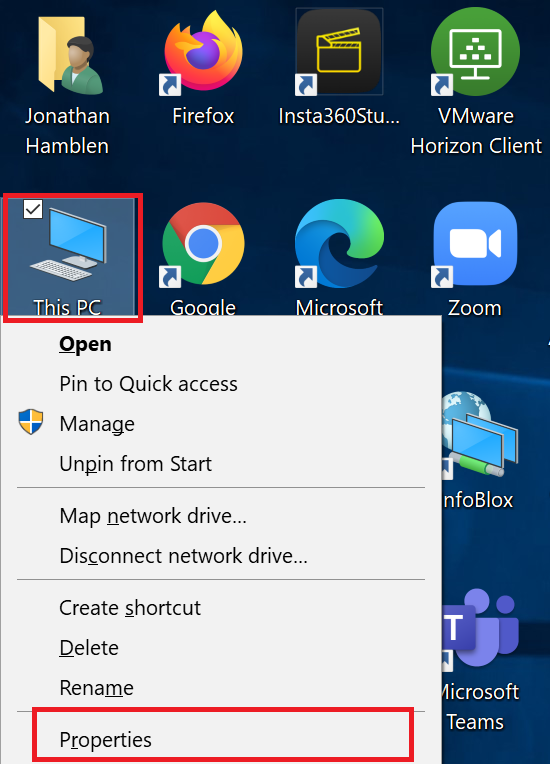
If you have a This PC icon on your desktop, you can also right-click and select Properties from there.
Step 5
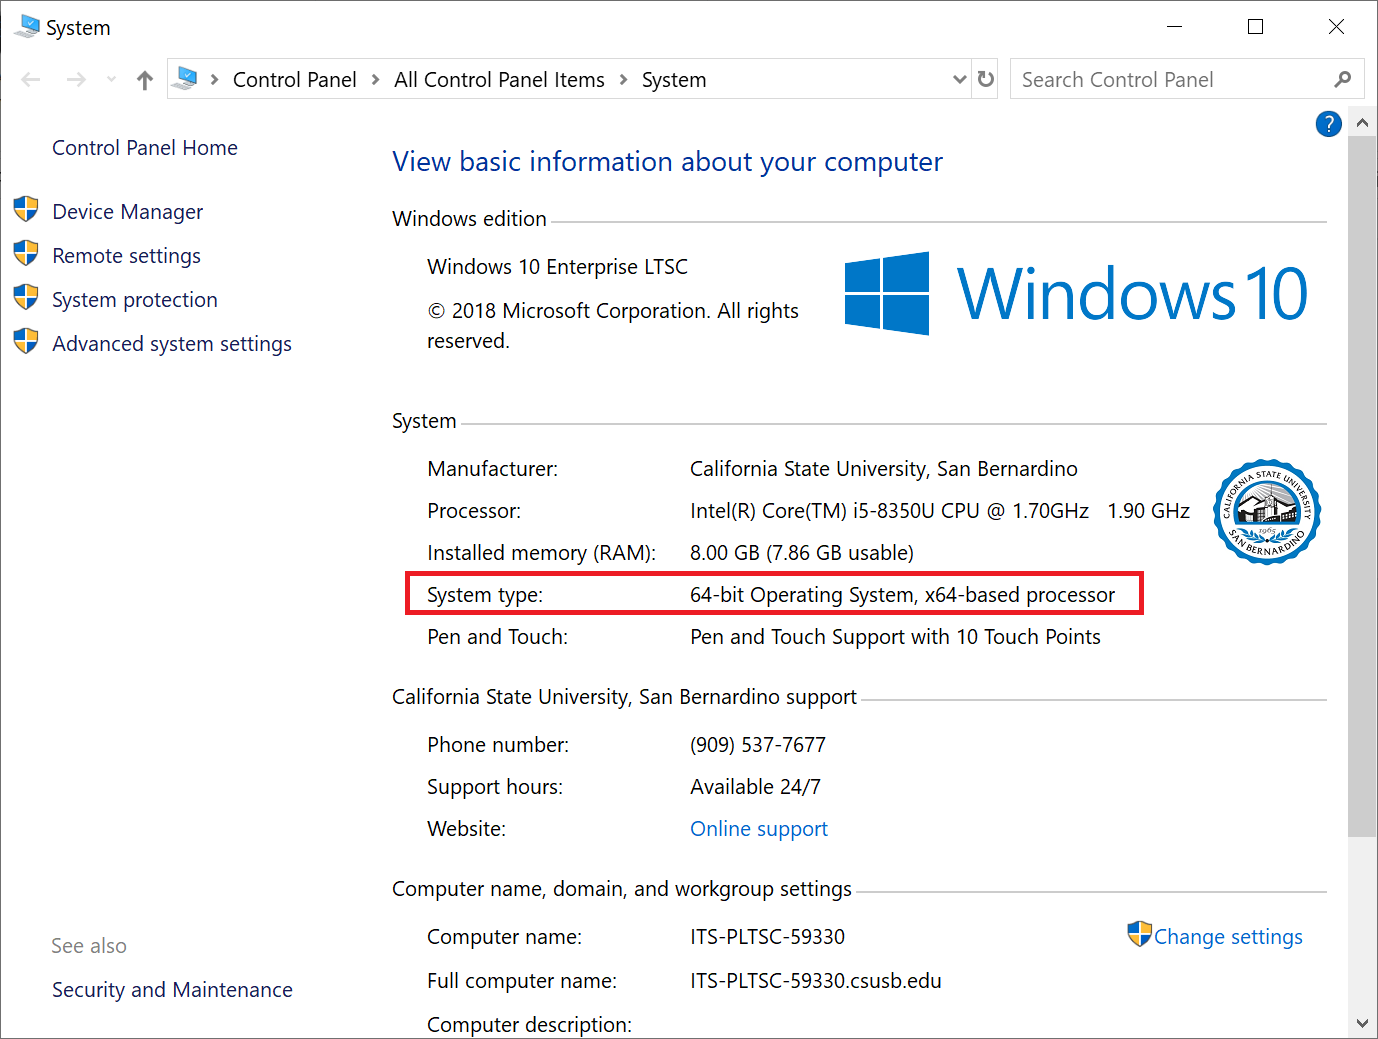
Here you can see that this computer is running a 64-bit version of Windows 10. So, the 64-bit version of the global protect client is what should be installed.
Step 6
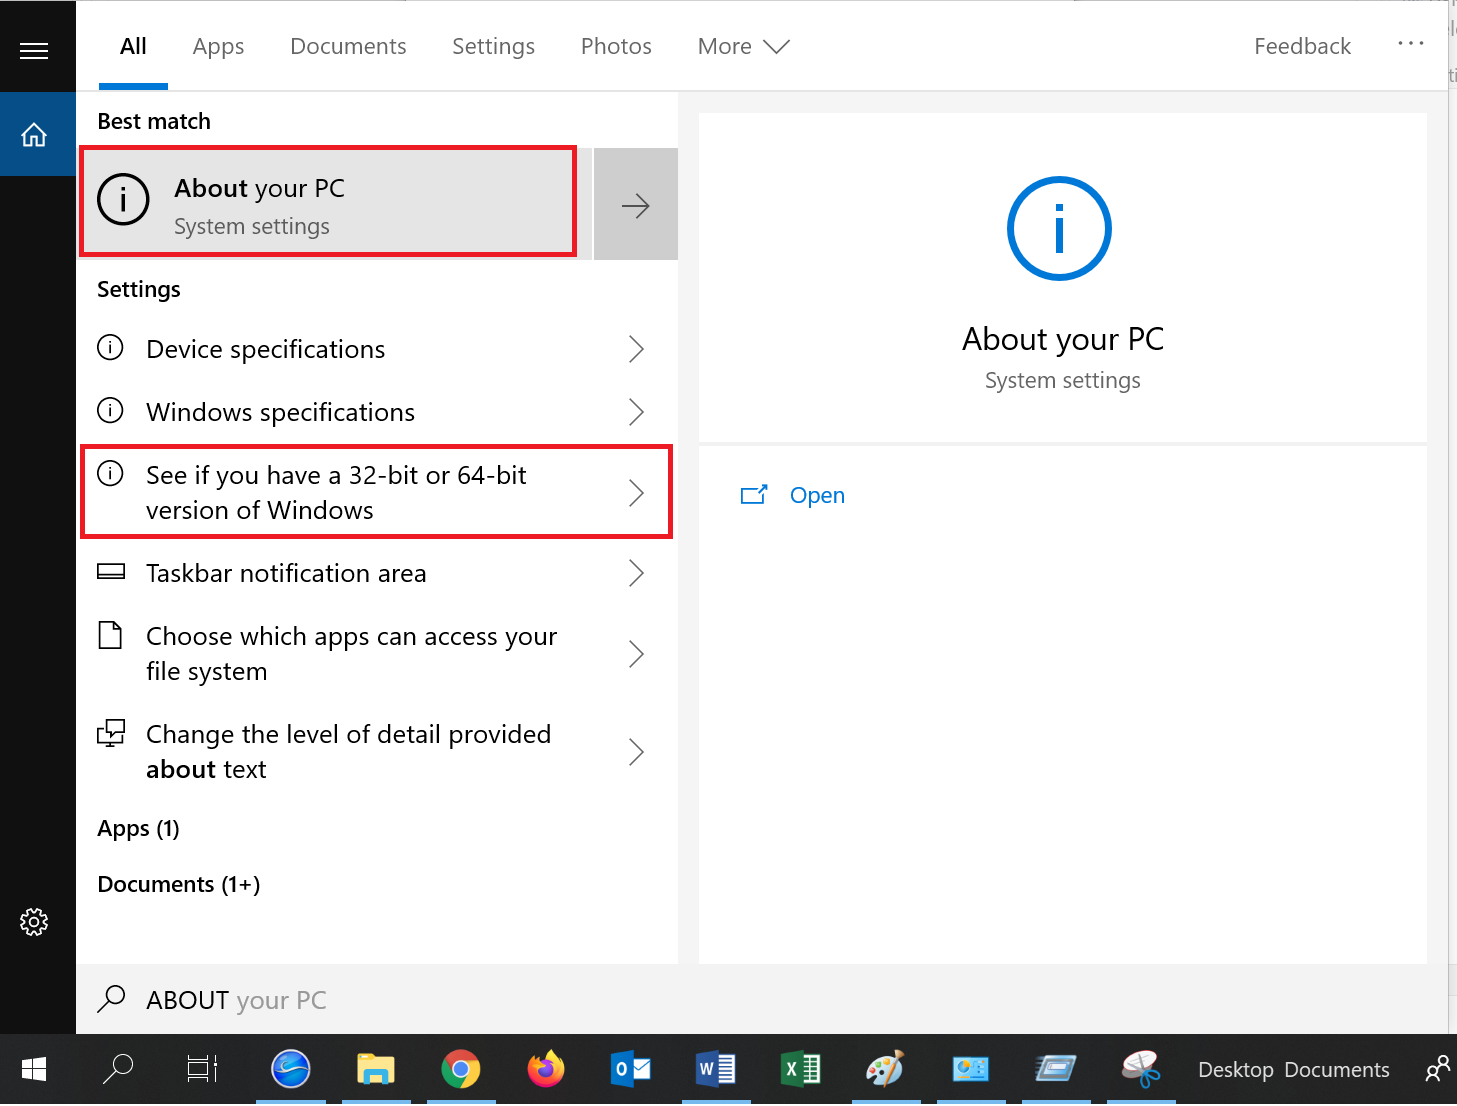
An alternative method on Windows 10 is to type About in to your Start Bar. Click the About your PC Button.
Step 7
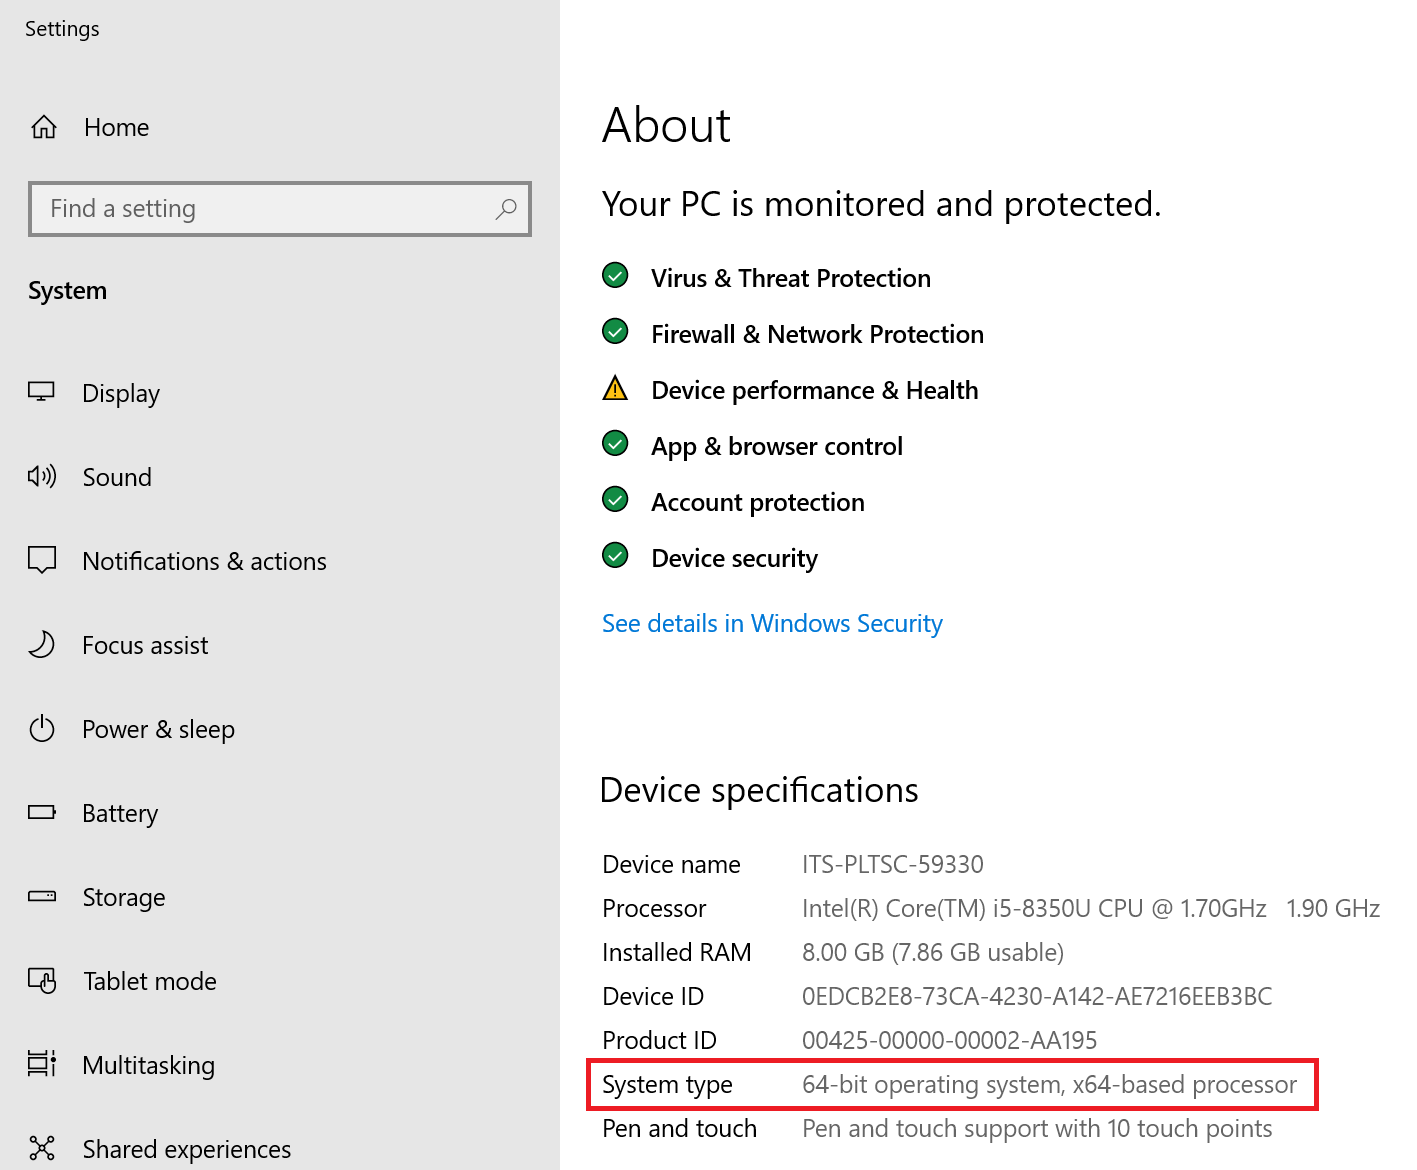
The next screen will show you whether or not you’re running a 32-bit version of Windows or a 64-bit version of Windows.
Step 8
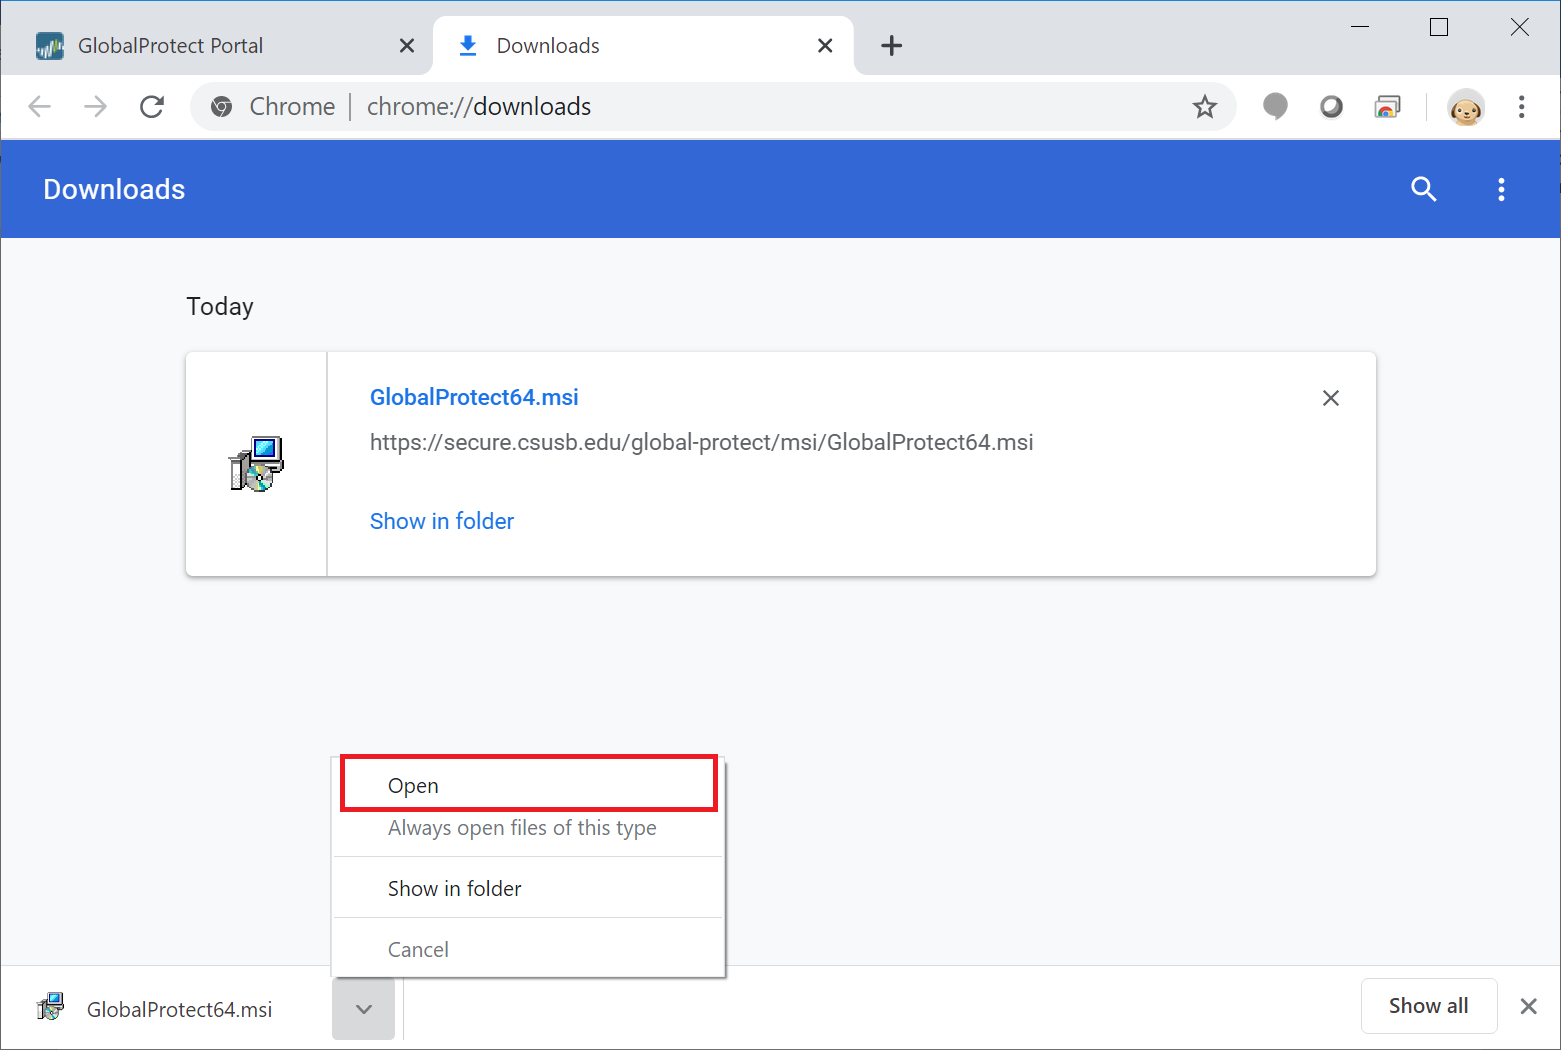
With the correct version of the Global Protect agent downloaded to your computer, open / run the installer.
Step 9
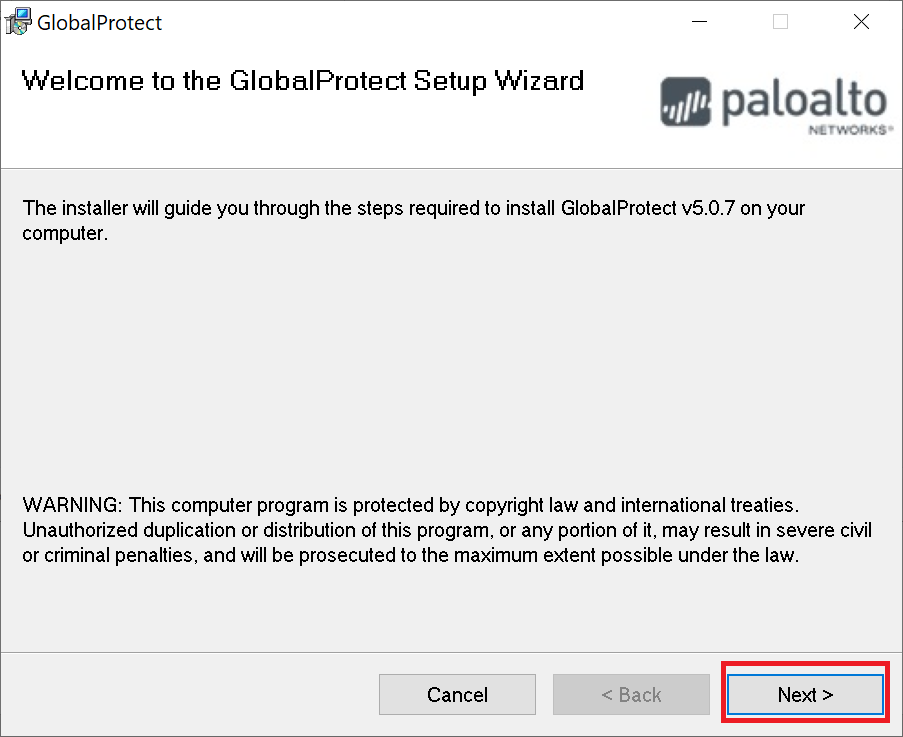
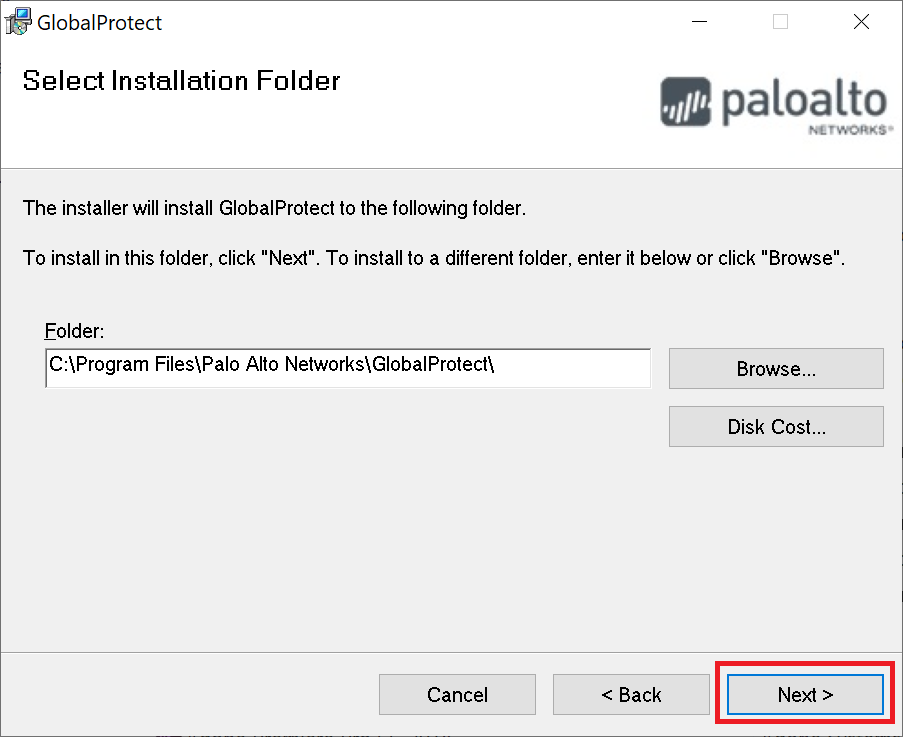
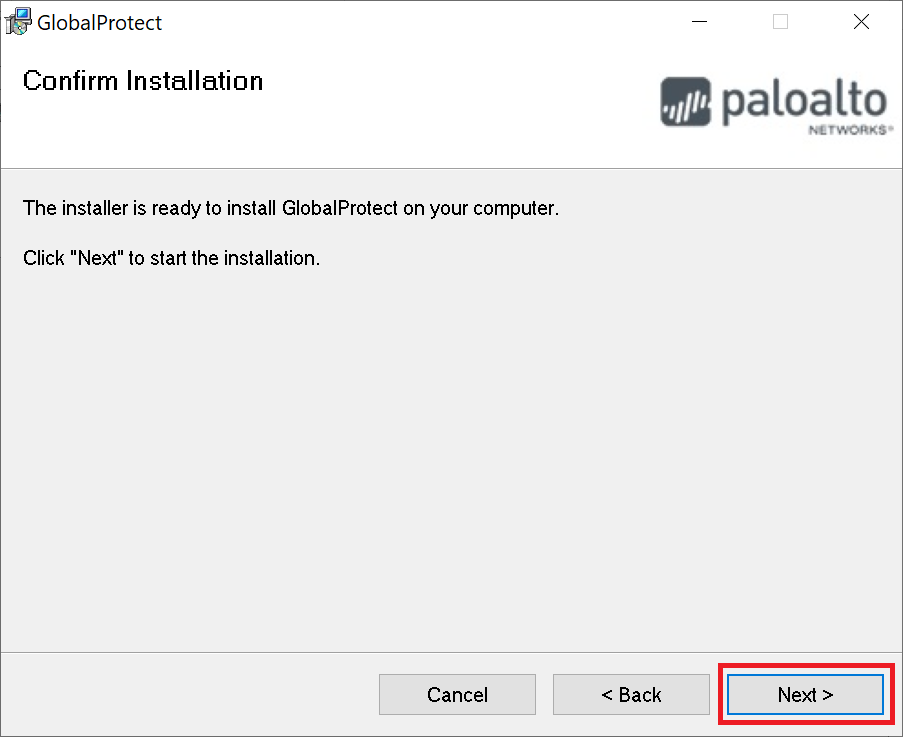
You can hit the Next button on the following screens to continue to the Global Protect installation with the default settings. Nothing needs to be changed or added to the installation.
Step 10
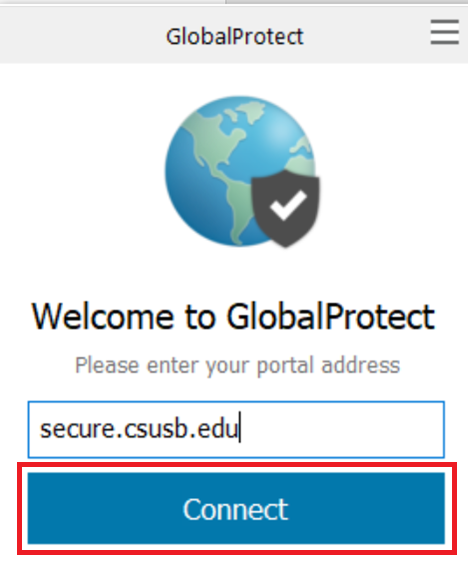
Once the installation completes, you will be prompted to enter the campus portal address. Enter secure.csusb.edu and then click the Connect button to continue.
Step 11
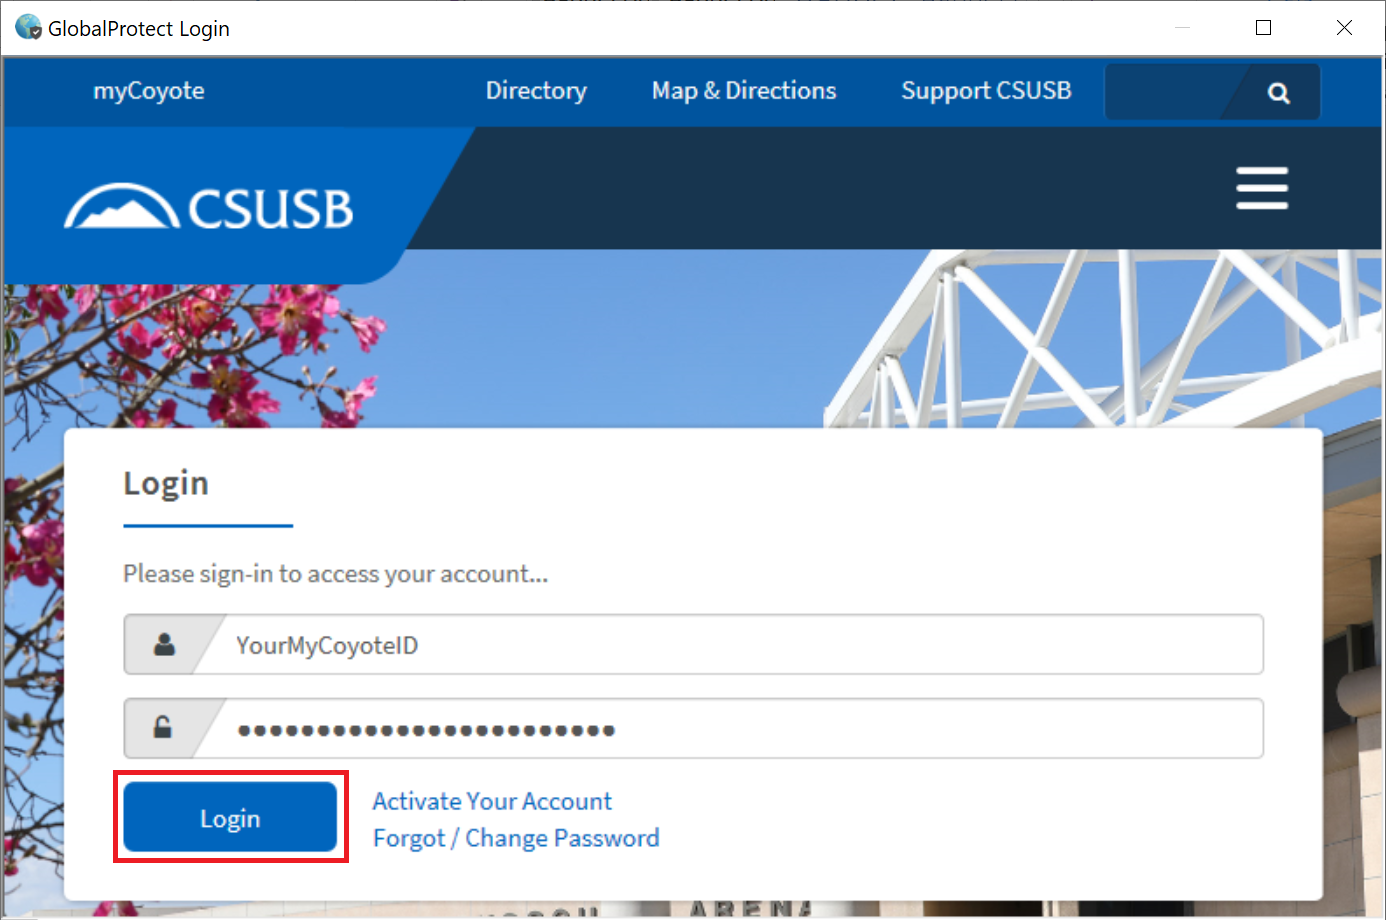
GlobalProtect will take to you to the campus login page. Enter your CSUSB credentials and then click the Login Button
Step 12
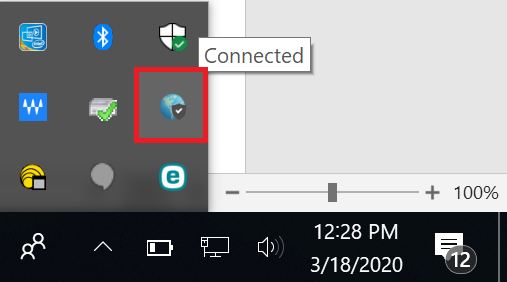
The global protect client in the lower right corner of your screen should now show connected.
